


1830s-40s menswear project - part 1: The Shirt
- clockworkfaerie
- Dec 2, 2025
- 25 min read

This article first appeared as a series, published in 2020-1 on Foundationsrevealed.com.
How does one go about making an early Victorian gentleman’s suit of clothes? One piece at a time.
Here's some inspiration photos and fashion plates! I am a musician and wanted to make a classic Romantic era suit for myself.


The 1830s are having a moment right now! I’m not so into the dresses, but I love the menswear! So I’ve decided to jump in to making a menswear suit for my (femme) body. I’ll be hand sewing and keeping things as historical as possible.
The desired silhouette of this time is already SO feminine that I’ve decided against anything like padding my waist out or binding my chest for this project. I’ll wear a sports bra/compression bra, but other than that I’m working with my body as is and perhaps padding up the neck and front shoulder as a man of this time would have. I’ll include some notes later on in the pattern cutting for ideas on how to modify this for an even curvier feminine figure.
We will build the look from the skin out. First order of business: the shirt.

~~~~~~~~~~~~~~~~~~~~~~~~~~~~~~~~~~~~~~~~~~~~~~~
I’ve previously made the men’s shirt from Norah Waugh’s “The cut of men’s clothing” and I knew I wanted something similar, yet updated here. I turned to Hale’s “The Workwoman’s Guide”, first edition 1838, to see if that book would be helpful. You can download it here or read it on the internet for free, courtesy of the Internet Archive. https://archive.org/details/TheWorkwomansGuide/mode/2up
SIDE NOTE: If you are looking for how to make an 18th century shirt, you can totally use these directions and this book! The only difference will be the wrist and cuff.
I did find a few extant shirt photo galleries which I will share with you here! These were so helpful in figuring out details.
Workwoman’s Guide did indeed have many things to say about shirts of all kinds! First a bit about what type of shirt I chose to make, then I’ll jump in to the construction.
There are shirts of the working type and gentlemanly type included. We will choose the latter here, the only real difference being fabric amount and collar style. The author of Workwoman’s Guide says of collars, “These vary so very much, according to the make of the neck and chin, as also the taste of the wearer, that only a few general patterns will be introduced as guides.” I’ll be making a plain rectangular model, just peeking up over my jaw a tad, or able to be folded down on itself.
We find on Plate 18 in the “Linens” chapter, a variety of shirt detail options.
There seem to be two main front styles. One is “rather an old-fashioned shirt”, with the single ruffled slit opening in the front , and the rest are all the inset bib-type. If you’re after 18th century shirts, make the “old-fashioned” one!
As I’m browsing fashion plates and portraits of my favorite composers, I see that the shirt is not often exposed. The neck cravat combined with a higher-necked vest obscure it entirely, or when it is exposed, it is usually of the neat and flat pleated variety, though I do see ruffles on shirts in fashion plates up into the early 30s.


The shirt collar is undergoing a transition from being the sewn-on, tall, rectangular collar we know from the 18th century and regency to being a separate piece that buttons on with separate collar buttons. I’m going to stick with the older construction on this point because they seem to have equal prominence in Workwoman’s guide, and because I have made both types before and find the totally separate collar very fussy.
I’m using the rectangular collar straight from the measurement table on printed page 142 and the sleeve cuff shape from plate 18, Fig 12 (next page over, 143). I’ll be making “A gentleman’s shirt”, fig 5, with a wider button area.
I’m using the pattern size for “men’s small”, on page 142.
These shirts are entirely made of squares and triangles, so there’s no pattern to scale up—simply a table of width and length measurements for the pieces. Everything is listed in Yards (36 inches, same as today) and Nails (not a problem, one Nail = 2.25 inches).
I’ve made a little Illustrator drawing of the size I’ve chosen, both to help me with the names of all the pieces and to double-check that everything will fit. The book had an error with the size of the sleeve gusset and the size of the sleeve opening not quite matching up, which I’ve fixed in my diagram below.
I used these measurements as my final cut measurements, and used seam allowance of ½” on most pieces.

When this book was written, they assumed that you would simply buy the width of linen or calico to fit your body, and that all your other pieces could be fudged a little to fit on this fabric and be very economical in not making lots of little scraps. So if a piece doesn’t quite fit, you are allowed to make it a tad bit smaller or bigger! The only pieces that are less negotiable would be the collar and cuffs. Other than that, this shirt is cut *extra* roomy.
Let’s talk about how to measure for a shirt.

I’m using a few very simple measurements to double check a few key points. Note that if you use these measurements to draft your own pattern, you’ll need to add seam allowance.
1) the collar, which should close around my neck with barely 1/4” overlap on each side
1a)collar height. This is from base of neck up to jaw (or wherever you want the edge to hit if you’re making a sassy 1810’s shirt and want it all the way up). Some collars in the book are “made to fold over”, while others are not.
2)the sleeve length down the arm, plus 2” ease for bending elbows
3)the wrist cuff (wrist circumference plus ½” overlap on each side)
4)the body quarter-width, which will be my center-back neck straight out to top of bicep, plus 2”. (As a fail-safe, this measurement x4 should be AT LEAST your bust/chest measurement plus 10” ease.)
5)the overall length of the shirt. (not pictured—measure from shoulder to knee or desired length.)
6)the shoulder strap length, from base of collar to start of sleeve.
Workwoman’s guide states that shirts should fall to the knee. I’ve read in several places that the shirt tails should be long enough to wrap under the torso beneath the trousers. That’s up to you if you want it to be that long or not. I would suggest at least low-hip length.
~~
On materials and notions:
I’m using the cambric linen from Burnley and Trowbridge. It’s already the lightest weight, so I’m using the same fabric for the pleated front chest inset piece. I’ll be hand sewing everything with 100/3 linen thread from Londonderry.

Shirts of this era could have simple front buttons of mother-of-pearl, or for more fancy occasions they could have removable button-studs. Here’s a few from my collection. The 3 white ones in front are the button studs, and the taller ones in back are front and back collar studs.

I want an elevated afternoon look, so I’ll find a nice pin for my cravat but keep the buttons nice and simple. I’ve seen thread buttons on some shirts but more often see simple shell buttons.
I’ve found these mother-of-pearl Victorian buttons to use, which will suit fine. I’m picking out the chip-free, whitest ones. After a good wash with hand-soap they are almost like new.

Got everything, now let’s cut the fabric!
~~~~~~~~~~~~~~~
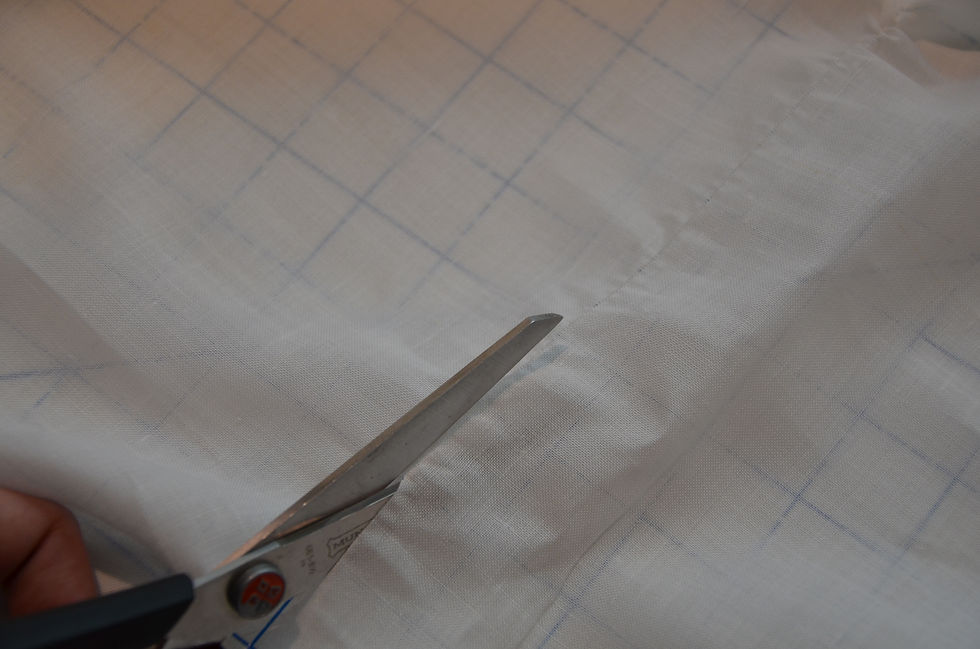
Workwoman’s Guide states “If shirts are made of linen, they should always be cut by a thread; but if they are of calico, they may be torn.” To do this cutting by a thread, one measures the length of the piece and there cuts a small nick in the edge of the fabric, finds a thread on the edge of the nick, and proceeds to pull it out. This makes a perfectly on-grain line on which to cut.
I’ll tell you right now; this pulling of threads can be a huge pain. Your thread will snap, and you’ll have to get a pin and find it again and keep pulling. It’s very worth it to have perfectly on-grain pieces though, especially as they’re all straight edges with right angled corners.


Cut the largest pieces first, and then proceed by size down to the smallest.
I’m following the book’s “Explanation of Making Up Shirts” on page 141 for construction order.
If you’re hand sewing, assemble your hand sewing tools. I’ve got here my linen thread and regular polyester sewing thread for gathers/basting, pack of needles, large tapestry needle for stroked gathers, beeswax block, thread snips, a thread scrap/ends basket to keep things neat, thimble, and a bone creaser. This last little tool is magic because it will allow you to crease/flatten seams without using an iron, thus freeing you to take your hand sewing anywhere you like and still getting crisp edges.

A quick note on needles: I’m using small tailor’s betweens, but I also like quilter sharps (which are a little shorter). You want a short needle that is still long enough for your fingers to grasp comfortably (I have quite long fingers so the wee fairy needles don’t work well for me). You want the eye of the needle to be small enough that it’s not hindering your pulling the thread through the fabric.
Thimble: I love these metal quilting thimbles. The squared off holes seem to brace the needle very securely. I’ll show you my technique in a video. If you don’t like it, that’s fine! Use a thimble that works for you.

Speedy tailor tip: Pre-cut, wax, and thread onto separate needles a few needle lengths of thread so that you don’t have to stop when the first one runs out. Just pick up the next needle. I thread 4 or 5 needles at once. I use about 14-18” lengths of thread to start, so that I don’t have to pull my whole arm and shoulder to work the stitches at first. It’s an optimal length for me, but I have seen even as short as 8- 12” recommended. Find what works for you.
To wax them, just hold the thread against the block with a finger and pull with the other hand. You’re only looking to smooth the surface, not permeate the whole with wax. You may wax a second time if needed.
Here are a few quick videos demonstrating all the handstitches I’m using in the general construction, and how I’m using my thimble and holding the needle.
~~~~~~~~~~~~~~~~~~~~~~~~~~~~~~~~~~~
Construction
~~~~~~~~~~~~~~~~~~~~~~~~~~~~~~~~~~~
We start by folding the large body piece in half at the shoulder, making the front one nail (2.25”) shorter than the back.

Next, you may “put pins in as marks” for the sleeve attachment edges and sleeve gusset/side seam point, or do as I did and mark with thread.

The amount “space to leave for shoulders” is to be distributed over the front and back of the shoulder, not doubled. On my diagram you’ll see it’s half the original amount to try and demonstrate this.
You may cut the square out for the front/bosom here, or wait until the neck gusset shoulder strap stage as I did. If you’re not making an inset front, you’ll simply cut a T shaped slit. Make sure you only cut the FRONT and not also the back!
Hey, what amount *do* I cut for that neck slit, anyway? The book never says. What I have deduced is that you need to cut a horizontal slit right at the top of the shoulder fold of your shirt:
Width of shirt body piece minus length of two shoulder straps + length of two neck gusset square edges = neck slit amount. Also take away about ½” total for seam allowance in the gusset insertion. Center this slit.
Next is side seams and hemming the lower edge. I’m going to do what this book calls “German hemming” in the first chapter, and what you may know as “Run and fell”. The option is also presented to hem the entire edge and simply whipstitch them together where you want a side seam. It’s about 33% more sewing, so you decide.
First thing is to sew the seam, right sides together, with a running stitch. (I’m using ½” seam allowance here.) Start with a tiny backstitch rather than a knot, I promise they’re just as secure and less bulky.
I’m making the first stitch of each needle-full a backstitch for more security.

Once the seam is sewn, clip to a thread or two short of the seam, and trim off one side of the seam.

Use the creasing tool to fold over the larger side of the seam.

From the outside of the shirt, crease the seam flat

, then fell down the folded edge on the inside, with tiny, even stitches.

Now that the side seams are sewn, we will hem the lower edges. You may use a rolled hem, or do as I did here and simply crease a ¼” edge, then turn it up again and fell stitch the whole thing down.

“Proceed next to stitch the collar and wristbands. Let the stitching be made about 6 threads from the edge, and carried all round both the wristbands and collar; taking care not to pass the stitches through both folds of them at the opening or part, in which the fullness of the sleeve or shirt is to be gathered.”
Here I have a wristband piece.

I’m folding it in half at the top, and turning all the other edges under by ½”. Pull a thread at ½” from the cut edge and fold along the place where the thread was. This will be very helpful in a bit, when we pull more threads to stitch along.

I haven’t been able to find whether or not the actual edge is sewn together in some way before the tiny backstitch is done around the edge. As I’m looking at extant shirts online, none of the photos are clear enough for me to really see, but I see a kind of ripple effect in a few of them that makes me think the edges are actually sewn first. So that’s what I’ll do here. A whipstitch sits too much on the surface for my liking, so I’m using something more like a felling stitch to secure the edges of the wristband together.

In this photo the needle has a few stitches all stacked up to show the structure, but when I’m sewing them I only do one stitch at a time.
Since the top edge of my wristband is folded over, the only edges I’m sewing together right now are the sides where there will eventually be a button and buttonhole. Leave the wrist edge open to put in the shirt sleeve.
For the topstitching, we’re going to draw out a thread, 6 threads from the edge.

All this drawing of threads may be a pain, but it makes the stitching MUCH easier and neater in the end.
I did 12 threads from the edge because I was reading about stitching from an earlier part of the book and got confused, so it looks a bit wide.
The book says (page 2) that this stitching should be done thus: “In stitching, take two threads back, and pass the needle so as to come out from under two before.” I ended up with a stitch length more like 3-4 threads. (I was also using 80/3 thread for this part because it was what I had on hand at the time. The good 100/3 thread came in the mail later, and you’ll see in later photos it’s much cleaner on this super fine linen.
The book says to do this all the way around (but not on the wrist side until after you’ve set in the sleeve).


Don’t forget to stop ½” short of the folded sleeve edge! Otherwise you’ll have to put the shirt in only on one side of the stitching, not all the way to the folded edge. You can see that I forgot all about this (because I waited to fold up the sleeve edge, for some reason) and had to take some stitching out later.
So, now that your wristbands and collar are all sewn, we will take a break to prepare the shoulder straps and the small gussets.
I folded each edge of the shoulder strap until they met in the center, then picked a thread and drew it out for a more exact folded edge.


The little wrist and hip gussets we will draw a thread and crease ¼” away from the edge on half of the square. The other half will be seamed into the split.


Time to sew up the sleeves! Get your sleeve piece. Very important: the sleeve down the arm should be the 20” long side, not the 16.3” long side. I got mixed up and accidentally made my sleeve very short.
First thing is to sew on the underarm gusset (this will be the biggest one). Draw out a thread on the underarm gusset ½” away from the edge to sew along if you haven’t already, and sew one edge of the underarm gusset to the sleeve arm seam edge (Right sides together) with an even ½” seam allowance.


Next, bring the other side of the sleeve over to meet itself so it’s making a tube to go around the arm. Sew the next side of the underarm gusset to this other edge of the sleeve seam, still using ½” seam allowance.


We are going to fell down the sleeve edges (not the body edges) of this underarm gusset, but not yet. First we are going to sew the seam down the arm.

Leave about 3 inches for the wrist gusset at the end of this seam, and sew it the same as we did for the side body seam. I clipped the seam allowance right at the point of the gusset, trimmed one side of my sleeve seam allowance, and felled the other over (it doesn’t matter which direction).


turn under, crease, and fell down the two sleeve sides of the underarm gusset, making a nice corner over your sleeve seam.

Now we turn our attention to the wrist opening. Get out the smallest gussets and seam them into the split, using ¼” seam allowance on the gusset but matching the finished on the sleeve. Narrow-roll hem the rest of the shirt wrist opening below the gusset. You may need to trim the seam allowance down to ¼” as I did, to match the finished edge.


Trim down the sleeve seam allowance of the gusset to ¼” or smaller, then crease/fold it all towards the gusset and fell it down neatly. You may find you need to cheat and roll the edges of your wrist gusset slightly larger or smaller, this is fine.


Now the sleeve looks like this! Hooray!

Hopefully yours looks longer and thinner. (I put mine in the short way and didn't realize until it was too late LOL.) Put your sleeves aside while we continue on to the neck and lower shirt.
The book has you do the hip gussets and lower edge hem next. For these I used the same method as for the wrist gusset. Rather than rolled hem, I turned up the lower edge ¼”, creased it, then turned up another ¼” and felled it neatly down.
While we are in gusset-land, the book has us next proceed to the neck gussets. She says to do these the same way we did the little gussets, taking care to put the stitched part on the right side. But she also says on page 138 “The neck-gussets are generally single, therefore, one gusset, cut cross-wise [on the bias] in half, forms the pair.” So I have settled on a method that I’ve derived from studying the photos of extant shirts.
Neck gusset and shoulder strap time! Go ahead and cut your neck slit if you haven’t already. Here are my instructions from earlier in case you need them again:
Hey, what amount *do* I cut for that neck slit, anyway? The book never says. What I have deduced is that you need to cut a horizontal slit right at the top of the shoulder fold of your shirt:
Width of shirt body piece minus length of two shoulder straps + length of two neck gusset square edges = neck slit amount. Also take away about ½” total for seam allowance in the gusset insertion. Center this slit.
To add another wrinkle to this situation, you’ll notice on my first extant shirt example that the neck gussets are on one side attached to the inset front/bosom piece! If you are NOT doing the inset front, you can ignore this side-quest and simply continue on with inserting your neck gusset, as the rest of the shirt front will simply be gathered into the collar along that horizontal edge we’ve cut in the top of the shoulder, with a vertical slit cut and narrow roll-hemmed for the front opening below the collar.
However if you (like me) are doing an inset shirt front, you’ll need to take a break from all your gusseting and do that part first.
~~~~~~~~~~~~~~~~~~~~~~~~~
There are almost no rules for the inset shirt front, other than that they should “Overlap by a full nail (2.25”)”, page 143. On page 142 she writes “In most of them [gentleman’s shirts] also, a piece of linen is cut out in the front or bosom, and two piece of cambric, or fine linen, either plaited, or fulled [gathered] in the place, to form the two sides of half fronts to the shirt.” Back again to page 143, she does give a few details on this inset front for a gentleman’s shirt:
“This front is stitched down with the greatest neatness, in the most perfectly regular plaits [pleats], either broad or narrow, according to the fashion. The distance of the spaces between the pleats also varies much; sometimes an equal distance with the width of the plait is observed, at others only a half or a quarter, and sometimes the plaits are made to over-lap one another: this last mode looks heavy and common. Either buttons or two sets of button-holes are put, to admit of shirt studs, in which case, the buttons of one side are straight down the hem, and the corresponding button-holes on the other side are cut width-wise.”
With this information, combined with the fashion plates and portraits and extant shirt, I’ve decided to do a nail-wide center band, with some ½” pleats on each side, separated by ¼” space. There will be two buttonholes for buttons, as per the book’s information. This is consistent with what I’m seeing in fashion plates.
I’ve cut two front/bosom pieces the specified size in the book—13.5” wide, and same length as the front cutout plus 1” for seam allowance at the bottom edge. The first thing I did was draw a thread and fold over the center front edges by the width of a nail plus 3/8” for seam allowance, turn under that seam allowance, and fell the edges down on the wrong side.


I also measured half a nail in from the new edge and ran a basting thread to remind me where center front would be/where the buttons and buttonholes will meet.

next, I’ve drawn a thread ½” towards the interior to be my stitch line for the first pleat. Another thread is drawn ½” further away to make a perfect fold line for the edge of my ½” wide pleats. I then proceed to stitch with tiny backstitches this tuck/pleat. Once it is all stitched, I use the bone creaser to make it nice and flat, laying towards the outer edge.


I draw another thread ¼” away from where the edge of my first pleat lies, and begin the process again. I make 3 pleats per side and decide that’s already wider than what would be the visible area, so 3 is where I leave it.
Here’s what we have so far.

Next, it’s time to tackle the buttonholes. I realize here that I’m going to have to finish the top edge of whatever overlap exists on my shirt front if I don’t want to have my collar ALSO overlap by a whole nail. So I do as the Augusta Auctions 1820s shirt maker did, and finish the left side of my inset by clipping right at center front, folding the seam allowance in, and whip stitching the edge down. This little point will get its own buttonhole, so my shirt will button off to the side at the collar (it won’t be seen, it’ll always be under a necktie or cravat) instead of right on the center front of the neck (which I find uncomfortable anyway).


Now it’s time for buttonholes! I’m taking the book’s recommendation and using two buttonholes on the center front. I’m spacing them on even thirds of the distance, as that’s what I’m seeing in fashion plates.

mark a slit for your buttonhole with a pencil. The usual formula for length is the width of the button plus the height of the button.

Do a tiny backstitch in a box around this slit, about 1/16” away from the mark. This will firm up the weave and provide a solid foundation for the buttonhole stitches.

Cut the slit with a buttonhole chisel, or a very sharp xacto knife or scissors. A buttonhole chisel will make the straightest line and therefore make your buttonhole look the neatest. Your buttonhole will only be as straight as the line you cut right here.

Time to do the buttonhole stitch! I’m left-handed so you may need to flip this, or go look up another handsewn buttonhole tutorial if you’re right-handed. I bring the thread up at the outer bottom right corner of my buttonhole, and work the stitch upwards. The shape of the stitch is shown in the second photo. It’s related to blanket-stitch, but has an extra twist in the knot/stitch. Make sure the stitch is taken *past* your tiny backstitch outline, to secure it. Pull so that the knot slides down into the buttonhole slit edge.


On the ends simply do 3-4 straight stitches through all layers to firm up the end of the buttonhole.


The completed buttonhole.
Let me show you here briefly how this will all fit together. Since I was learning this as I went, I did the neck gussets and shoulder straps first, and then pinned on the inset front to see how it would fit/if I needed to cut any of the side of the inset off.

I ended up having to unpick some of my neck gusset to fit the pleated inset front in such a way that the neck gusset s would sit at the right place on the side of my neck. (also, I was worried that the shoulder strap was too short and tried to scoot it out of the sleeve seam as much as possible, you don’t need to do that.)
I also pinned my collar around my neck at this point to check that it was doing what I wanted. I started with the 18” length given in the pattern, and ended up shortening it to 16” with barely ¼” overlap in front to get this shape.

It’s important to note here that it’s possible and probable that your inset front will actually be narrower than the square you cut out of the shirt front. This is apparently quite normal, and is managed on the extant shirts I’ve seen by a simple gather or pleats at the center front lower edge of the shirt cutout.
I’ve pinned the two halves of my inset front together at the buttonholes, and will fell the sides and lower edge into the shirt with the same method as for the shirt body side seams. I am putting the seam underneath my last pleat, so it won’t show on the outside of the shirt.


For the lower edge of the inset front, I’m going to gather the excess in.
I turn under and crease the collective lower edge of the inset, so that I can do stroked gathers for this shirt edge.
These are from the inside of the shirt.


This last photo is the front from the outside, with the gathers individually whipstitched down. On the wrong side I simply overcast (big whipstitched) the raw edge down to the shirt.
Now with the front inset all settled, we’ll move on to the neck gusset and shoulder straps.
We are going to fell one straight edge of the neck gusset onto the shirt inset/front edge, and the bias-cut side of the neck gusset will be simple seamed WITH THE SEAM ALLOWANCE FACING OUT to the back of the shirt. The shoulder strap will cover this side of the join, but not the front inset side of the neck gusset.


First step is felling the neck gusset onto the shirt front.

Here is the neck gusset with the back edge of the shirt attached. I used a simple running stitch with the first stitch of each needle a backstitch, same as for step one of my long side body seams. See how the seam allowance is on the outside of the shirt here? Crease/press towards the back body.
Next, take the shoulder strap and lay it with folded edges under, centered on the shoulder fold of the shirt, with one end at the sleeve edge and the other end up at the neck, covering the neck gusset back body seam. Pin in place. We’re going to tiny backstitch this shoulder strap piece down along both long edges.

Pull out a thread 6 threads away from the folded edge, to stitch along.

I’ve basted the whole strip down with large stitches to help with neatness. Proceed then to stitch in the drawn thread line, with a 3-4 thread stitch length.

the completed neck gusset and shoulder strap.

Doesn’t it look so pretty? I think by this point in the project my hand sewing had much improved! All it takes is some practice.
Next are the “linings” or “binders”. This is a long rectangle that will function to both finish the sleeve-body seam, and provide some extra reinforcement against suspenders or braces wearing a hole in the shirt.
Turn under ½” and crease one long edge of a lining piece and both the short edges. Pin it in place on the inside of the shirt, with the folded edges towards the interior and the raw edge matched with the raw edge of the body.


Fell the turned-under edges down to the shirt, leaving a gap near the side seam so that it’ll be easier to insert the sleeve.

Now we come back to the sleeve. The instructions never specify to actually put the wristband on the sleeve, so we will do that task now. You’ll notice a pattern with this book’s instructions. She’s trying to group tasks; so that you’re doing ALL of the stroked gathers at once, all of the gussets at once, etc. It makes for more efficient sewing, when your body is used to a certain stitching task.
STROKED GATHER INSTRUCTIONS:
Here are the book’s instructions.
“Observe that the part going to be gathered is cut evenly and straight. Divide the piece into half, and then into quarters, putting pins at the divisions as marks; do the same with the piece to which it is to be gathered, by which means the fullness will be equal.
Begin about 12 or 14 threads from the top, take up three threads on your needle and miss four, more of less according to the fullness required: when a quarter is done, draw the gatherings pretty closely, and secure the thread by twisting it round a pin; then stroke the gathers nicely down, one at a time, with a large needle, so as to make them lie closely and evenly together. Afterwards, untwist the thread from the pin, and loosen the gathers till you have made the quarter gathered, correspond with the quarter to which it is to be sewn. Fasten the thread again firmly to a pin, and sew the gathers strongly on, one at a time, letting the stitches take a slanting direction, so as to slip between the gathers.”
I followed these instructions and they worked well for me. I did use one long gathering thread for the whole piece, but I could see wanting to use multiple pieces of thread for a larger piece like a skirt waist or something.
Run the gathering threads (I did use the recommended 3-5 thread stitch length) along the body edge and wrist edge of the sleeves.

Lay the wristband on top of the right side of the wrist-edge gathers (turn under and crease the final edge of the wristband up ½” if you haven’t already), pin as described into halves and quarters, then start stitching, leaving the other side of the wristband free. (It’ll be like stitching one edge of an envelope down.) Here’s a video I made to demonstrate the stitch in action. You’ll notice I’m straightening and moving each tiny fold into position as I go. After you do the first quarter, you’ll get a better feel for the proportion of the gathers and how you should space them going forward.
After you’ve done the top side of the wristband, turn the sleeve inside out and secure the skin-side of the wristband in the same fashion (or use felling stitches if you’re very over this tiny gather stitch).

Do the same method to attach the sleeve to the body. Turn under and crease ½” the remaining body edge. Gather only the sleeve part (not the gusset) of the sleeve, and attach it to ONLY THE BODY (leave the lining/binder free). Continue down the edge and fell it to the gusset, matching the raw edges.

To finish this lining, turn under the last free edge of the binding to match the sleeve seam or a little shorter. Fell it on with small stitches, and whipstitch together the turned edges below the gusset point.


Alright, the sleeve is on! It’s feeling like a real shirt, and we’re so close to the finish!
The last bit of stroked gather work is the neck.
The only part of the neck that I’m actually gathering into the collar is the back of the shirt. The front part with the pleats will stay as is. You can gather or slightly ease the triangle neck gussets into the collar if needed, but you’ll lose shape the more you gather it, thus defeating the purpose.
If you’re making an 18th century shirt, or an “old-fashioned shirt”, you’ll gather the front neck into the collar to fit. For this I recommend trying on the person if possible, to see where the shoulder straps should sit and find the right proportion of gathers for the front and back.
We’ll do the same stitching routine here as we did for the cuffs. Turn and crease the open edge of the collar if you haven’t already. Run the gathers, and fell the collar top edge neatly on to the neck. Secure the inside of the collar in the same fashion.
You’ll notice that I’ve finished the other side of my shirt inset to match the top/buttonhole side, and left that ¼” past the center front (marked by basting) for my collar overlap.


If you’re making an Old-fashioned shirt, you now will sew the bosom-bit at the bottom of the chest slit. Some shirts also have a little tab with a buttonhole attached at the bottom of the inset front, I assume to be able to button to the trousers and ensure the shirt front stays taut. I’m not doing that here, as it doesn’t seem as common until later in the Victorian era, and my inset front doesn’t quite reach that low.
We can now move on to finishing the stitching on the wristband and collar at the gathered edge. Matching the stitching you’ve already done along the other 3 edges, draw a thread and tiny-backstitch. You might (as I did) have to stab up and down for the first few stitches where it’s very thick, but I had no trouble doing the rest of the stitching in the usual manner.

“…and when the buttons are put in, the whole is completed.” So close! Let’s sew some buttons on!
Stab a pin through the completed buttonholes onto their counterpart pieces to mark where the buttons should go. Workwoman’s guide says to sew a 4-hole button with a cross pattern. Mine are only 2-hole buttons so they’re nice and simple. I work with a doubled thread and sew through each button 6-8 times, till the holes are near filled with thread.


Woohoo! We’ve just handsewn an entire shirt!
As a celebratory last step, I’m going to mark my shirt with my initials, linen number, and the year.
“The shirt is marked about an inch below the left hip or gusset.”
Workwoman’s guide does have several monogram alphabets in the first chapter, on plate 1. More detail is given on page 5 on size and execution of stitches, and also how exactly the man’s initials and his wife’s (making the shirt) would be recognized. Since I’m both the maker and wearer of this shirt I won’t have this problem. I’ll use my first and last initials, the number 3 (it’s the 3rd linen undergarment I’ve handsewn and this tickles me as a weird little historical nod that if I were to send these away to be laundered, the laundress would know which ones were mine and how many there ought to be), and the year.
This is going to be absolutely the most mini, microscopic cross stitch of your life. If you haven’t done counted cross stitch before, I highly recommend to get yourself one of those itty bitty 2” square kits from your local craft store and learn that way first, then have a go at this.
“In marking, two threads are generally taken each way.” That means that each cross will be 2 threads by 2 threads. She wants you to make a third stitch in each x, straight down (in-between the threads) but I didn’t find this necessary or even really doable. Perhaps it would be with thinner thread, or coarser linen. I used 1 strand from the 6-strand divisible DMC cotton floss, in a dark grey color.


I’m so proud of this final product! I learned so much doing this project, and I hope you’ve enjoyed and had fun learning along with me. On to the trousers and waistcoat next!


Comments