


1830s-40s menswear suit project - part 2: Trousers
- clockworkfaerie
- Dec 14, 2025
- 33 min read

Hello! Thank you for reading today. If you would like to support this and ongoing educational material on making historical clothing, please donate here! If you missed part 1, about the shirt, you can find it here.
This originally was written for and published on Foundations Revealed (now defunct) in 2020-21.
I’m a woman, and I’m making a romantic era menswear suit for my body. I’ll be using the drafts from this 1840 book “The Tailor’s Master-Piece”, by Scott & Wilson. I’m also a pianist, and I thought it’d be interesting to dress in the clothing of some of my favorite romantic-era composers and see what it felt like. There are of course women composers and performing pianists during this time, but something about the power of a suit intrigued me.
The ideal male silhouette during this time is so feminine, that I’m going to aim for the fashion-plate look as much as possible, while staying comfortable. I don’t want to corset for this outfit or do drag style body padding, but I will do the period-appropriate padding in the chest and neck area of the coat. We’ll talk about the waistcoat and frock coat later. Last time I made a shirt with you, and now we’re moving on to the clothing for the lower half of the body.
In the literature of the time, the clothes for the lower half are more often called Pantaloons (for these long versions) or Breeches for the short, knee-length version (which in the romantic era seems solely reserved for formal occasions). I’m using the word Trousers as a modern convenience, and to distinguish these from undergarments, which I believe are called “pants” in the UK.
Men’s trouser drafts can work for women’s bodies! It’s important to get clear on what effect you want, and be honest about the body you have so that you end up with a garment that fits. On the subject of “getting clear about what you want”:
After studying fashion plates, extant garments, and a few photos, these are the goals I’ve come up with. For the trousers, I want as smooth a line as possible from hip to shoe, with as small an ankle as possible. These will be high-waisted trousers, with the waist edge hidden under the waistcoat.
These will be button-fly and have hidden buttons at the hems for a strap under the shoe. In fashion plates of the time we do see a few fall-front styles, but the button-fly seems more popular.
Here are my inspiration extant garments:


Here are a few fashion plate examples.


~~~~~~~~~~~~~~~~~~~~~~~~~~~~~~~~~~~~~~~~~~~~~~~~~~~~~~~~~
The draft I’ve chosen is from 1840, and is from the book “The Tailors Master-Piece” by Scott and Wilson, 10th edition. There are on the front page, directions for making a divided scale from this strange upper body measurement. This won’t be needed until we get into the waistcoat and frock-coat, so skip it for now.
Measuring
I’m measuring over some ponte knit leggings. They’re not really tight or loose.
Wear something that will have the same amount of fit/compression that you want in the finished garment, as much as possible. I want a snug belly and waist area, but the rest will be almost a straight line, so I’m not too worried about the rest of the leg. DO wear whatever shoes you plan on wearing with the trousers, because the ankle of the shoe will be VERY important to how these fit.
I’m making loose trousers. I wanted to see if I could get away with not using the strap under the shoe, but alas, it is essential for a totally smooth look. More on that later. Let’s get measured!
Here are the measurements needed, as laid out by the book. I’ve included my measurements for some kind of relative reference, and you can also use them if you want to practice.

1. Outseam length: 2.5”, 8”, 23”, 41.”
(measured from top of waistband to hem, with stops along the way for top of hip-bone, level of crotch split, knee, and finally the total, to the hem at just above heel level.)
IMPORTANT: You may find it more helpful to do the outseam measurement LAST, because the other measurements are helpful landmarks that will set this measurement up for success if you’ve never measured for trousers before. It can be helpful to put a bit of tape along the side of your leg to mark where you measured the circumferences and make an easy landmark for the outseam.
2. Inseam length: 30.5”
(measured from right up in the crotch down to hem, along the inside of the leg.)
3. Waist: 31”
(This is the top of the waistband, so take note; if you want your trousers to sit lower on the belly, measure there and not right at your natural waist, and make a note for when you do the outseam length. In this time period, men did wear trousers insanely high compared to today’s trousers. If you’re wearing the other things over it, nobody will see it.
4. Abdomen 38.5”
(This is measured at the hip bone for men. I anchored this measurement by the level of my front-facing hip bone and it worked well.)
5.Low hip/crease circumference: 41”
(This is around the largest part of your bottom/thigh/seat area. For me that measurement sat in the front hip crease.)
6. Thigh circumference: 24.5”
(I measured around the widest part here. I didn’t end up needing the thigh or knee measurements that I took because I wanted a pretty straight line from hip to ankle, but you can check these if you want a slimmer pant.)
7.Knee: 15”
(As I understand, this would actually be measuring the knee of the client’s trousers that he has on, NOT the natural knee circumference. If, like me, you are doing this for the first time, simply eyeball it. Make a loop with the measuring tape and look in the mirror to see what looks good.
8. Calf: 14”
(Again, just a fail-safe in this style of trousers. Useful if you’re making fitted pantaloons for fancy occasions.)
9. Ankle: 18”
(Story time! I measured this without wearing the boots that I’m wearing for this outfit, and got 10”. That might have worked if I had wee dance slippers, but the ankles on the boots are much thicker, and I had to enlarge the ankle quite a bit to not make a weird line, which you’ll see. If I started again, I’d definitely measure OVER the shoes for a measurement of about 18”.
10. Strap: 5.5”
(For this I measured from the imaginary hem on the inseam side of my shoe, under the sole in front of the high heel, and out to the hem again on the outseam. If you are making a toile, you can wait until then to do this measurement. However, I do find it interesting that this measurement would have worked/was accurate enough.)
There is also a “Heel” measurement that goes from inseam to outseam around the back of the trouser. This wasn’t useful to me at first because I was still trying to figure out how this all gets put together, but I do think it would be useful in future to help place the strap under the shoe.
That’s it for measuring! On to…
Drafting
We’ll be using the instructions on PDF page 11 – titled “Explanation of Plate No. 4”. On the previous page, a diagram appears along the right hand side to show us what our draft should look like.

It’s a little hard to read. I’ll make a drawing here so you can see it better, and see it drawn step-by-step. They are assuming you’re marking directly onto the fabric, but I highly recommend drafting on paper first and making a test version out of cheap sheets or etc. if you are doing this for the first time.
Step 1: Upper Side: “Line A represents the edge of cloth. Apply the measure from 1—dotting at 2, as top of hip-bone, at 3, opposite the fork; at 4 as the knee, and at 5, as the bottom of the pantaloon.”

“Draw lines E, F, and across at the knee, and bottom, dropping the line at 7 about ½” below a square with line A.” ““From [point] 5 to[point] 6 is from 5 to 6 inches for common size.” Easy enough. We square a 6” line out from point 5, the end of our outseam line. But what’s the distance from 5 to 7? Don’t worry about it yet. Draw an approximation, and we’ll refine it later.
These are just approximate lines right now, except for the ankle 5 to 6. Next, they’re going to tell you to do the inseam and AFTERWARD set the hip and waist circumference measurements, but that did not work so well for me. I found it much easier to do all the circumference lines first, then the inseam and shaping. The directions to set specific points on those lines is as follows: “Apply ¼ of waist measure across fore-part, between 1 and 2, allowing ½”, after the side is curved between 1 and 2 as represented.” So draw the line straight across, square ½” down at what will be the center front, connect it up with a gentle curve, and re-measure/re-mark as needed.
“Apply ¼ of measure taken around top of hip [our hip-bone measurement], from 2 to line G, allowing ½ inch. Apply ¼ of measure around the hips from 3 to 8 allowing ½ inch.”
“The distance from 3 to 9 is 1/3” the size round the hips.”
38 divided by 4 is 9.5”, plus .5 an inch is 10”. So my line 2 to G will be 10”.41 divided by 4 is 10.25, plus .5 an inch gets me 10.75” for this line, 3 to 8.41 divided by 3 is 13.66”, so put point 9 out past point 8.

Hooray!
Back to that inseam. “Apply the measure of inside seam, from 6 to 9, and establish point 9 by it.”

Please notice that on the original diagram it’s quite a straight line. I kept a fairly straight line, but did have more curve in the crotch area than the diagram. You may want to play with this line, depending on how much ease you want in the leg. If you want a slimmer leg, use those knee and calf measurements to set those points in the inseam line, then connect it with a smooth curve to the crotch point (9).
They DO tell you a bit later to curve the inseam in a tad bit below the knee in a beautiful, delicate bit of shaping below the calf, so go ahead and do this if your ankle and shoes allow for it. “Draw line C.” So helpful. My shoes’ ankles were too big so I didn’t do it, but I’ll draw it for you here. Start with perhaps ½” in from the inseam line at the widest point of the curve and make it bigger or smaller at the toile stage.
What if the number doesn’t match? After measuring your beautiful new curvy line, you can move point 6 up or down as needed. Mine was 2” longer than I measured on my body, but I decided to leave it as is and see what happened, thinking that perhaps I measured incorrectly. That seems to have worked well. They also tell you to slightly curve the bottom hem of the fore-part, to drape beautifully over the top of the shoe. “Form the bottom with a slight curve as represented by dotted line K.” Again, no amount is given. Try ¼” to ½”. Go with what is aesthetically pleasing and proportional.

The only thing left on the front is to draw the curve of the crotch and the vertical line of the center front.
“Draw line G, curve the fore-part at the fork as represented. ”Draw a straight line from 8 up to the center front point of the waist (where line E ends, across from 1). Draw a curve from point 9 that connects up with this straight line to form the shape of the center front.

I’m sorry that there are not more precise directions for where that curve should meet up with the straight line. This is a system that still has echoes of earlier ways of making clothes. It’s not the pinpoint-precise 20th century draft you might be more accustomed to. To some degree, it’s more about making a beautiful shape to the right proportion, rather than making every tiny measurement precisely fit your body.
The good news is, that’s the fore-part draft finished! You may notice that my line for the high-hip/tummy doesn’t match up, it’s too small. I think it’s useful to split the circumference measurements into front and back measurements if you have a big difference in either. That way you can check and see if the front really does need to be extended, or if the back piece will compensate for this discrepancy. You definitely can make a curvy center front if you like, but it’ll be harder to make the button fly for, or to convert to a fall-front if you wanted to do something like that later on.
One solution to the tummy curve problem is to balance it by making a curvy outseam. (shown below, new outseam in bright pink.) Move the entire line F (and the nameless high-hip/tummy line) toward the outseam without changing the length of either of those horizontal lines. Then redraw all curves until you get a nice, balanced shape. Lastly, re-check the out and inseam lengths and make sure they haven’t drifted longer or shorter. This also may solve some of the inseam problem and help you get a more fitted leg if, like me, you found yourself with a very big inseam curve instead of the gently drifting, almost-straight-line in the diagram.

Now, both of these shapes are functional. Having a totally straight line as your outseam will actually work. Do you notice though, that if you make a curvy outseam, it’s starting to approach a modern women’s pant pattern shape? Try both, and see what you like. I ended up splitting the difference between the two shapes. I will say, that later on I had to do a “bow-legged” correction for the lower leg NOT because of the shape of my knees and lower leg, but because of the outwards curve of my lower hip/upper thigh area and the sharp curve back in as it approaches the knee. So, if you have a similar shaped body you may also need to do this, and I’ll show it when we get to the toile stage and you can see what I’m talking about.
The directions never tell you when to make line B, so do it here while you’re thinking about curves and distribution. Line A is not your final outseam, it’s only the edge of the paper/cloth. Again, draw what looks pretty. Curve it in maybe ¼”-1/2” at the high ankle and back out again at the hem. Draw a bit of hip curve if you haven’t already. On to the Under-Side!
“Lay the fore-part (what we just drafted) on the cloth, letting line B touch the edge at the top, and cast it in at bottom from 1 to 1 ½ inch, and form the curve as represented by line I, and bottom as represented. Apply the measure across the fore-part and under-side at bottom, and allow the size necessary to agree with the measure, from 6 to 7, which is usually 3 inches, which brings the inside seam far enough forward on the leg.”
The blue line on the next image is the new outseam of the Under-Side. This is really just a way to get the right curve for the hem area of the outseam and make sure that it’s not too long or short. I think you could just as easily square out 1"--1.5”, connect it with a curve to the calf/knee area, and swing the hem up a bit to compensate for the extra distance.
The black line here is the fore-part, and the new green line is the hem for the under-side. Curve it down by roughly the same amount that you curved the fore-part hem up. Measure the green line plus the black one’s hem, and see if it matches up with your needed ankle measurement. If not, extend it further towards the left of the paper/inseam direction (or bring it closer to the outseam if it’s too big).

“From 9 to 10 is 1 ½ inch.” Easy enough. Mark the point straight out to the left from 9.
“Sweep 1 and 15 from 9.” Ok what I’ve done here is drawn a line straight from 9 to 1…

And I used it as the radius of a circle. Mark the arc in the general place where you expect the center back to meet up from 10.

The line and arc are in red, the new top of the under-side are in blue. The diagram does show curving the center back down about ¾” to 1” by my estimation, but never mentions it in the instructions. If you’re thinking “wow that’s a HUGE tall shape for the back!” You are correct, my friend. It’ll be less on a man’s body because of the shallower rise, so feel free to make that curve shallower and closer to the fore-part’s waist if you want.
Now we return to the hip circumferences. “Apply half the measure taken around the hips from lines G to A, and back to 12, allowing 2 inches; also the measure around the hips at 2, and allow the same; also the waist measure, allowing 1 inch. Draw lines H and D, and form the top, and line H as represented; also curve from line D to 10, as represented, and you are ready for cutting.” THIS EASE IS VERY IMPORTANT! You won’t be able to sit down in these if you skip it. I know it sounds like a lot, but just go with it and remember that it’s very easy to pin out excess fabric in a toile but very hard to add fabric to an area that is too small.
Line H goes from 10 up to the center back waist top edge (15). Mark dots for where those waist and tummy measurements would add up to when squared out from line A, and it will help you place line H.
Look very carefully at this next drawing. The red dotted lines are showing you how to check the tummy and low hip circumference. For the lower line, DO NOT measure along line F! Instead, measure directly around the hip right above where the crotch/fork curve is. Point 12 is on the diagram and in the directions only to help you understand that concept. If you measure along line F, it would be like if you wrapped the tape measure between your legs in a figure 8 when you measured the hip and the number will be too big.

So this goes as follows: for the low hip, take half the circumference (20.5” for me), and add 2” to it to get 22.5”. Measure across the pattern right above the fork/crotch curve and back across into the area past the center front, and mark the new point 12.
It should definitely be smaller/closer to the outseam than point 10. Follow the same process for the tummy line.
I’m sorry I can’t be more precise—your fork curve may look different than mine. If you have a very flat tummy, the point where the line 8 and CF line meet may be a good starting point. For me, it’s a bit lower as there’s a larger slope. The diagram has you curve in a bit from line H for the fork. I’ve also done this as it’s helpful to get a smooth seam in the fork. It’s OK if your center back seam isn’t a straight line.
Now, the easy part! Line D is the inseam of the Under-side. Copying the original draft diagram as much as possible, I drew a smooth curve from 10 that almost touched a point about mid-thigh on the Fore-part, then drew a smooth line down to 7 and curved it out a tiny bit. This is where those Thigh and Knee and Calf measurements all might be helpful. Check them the same way we measured across the pattern at the hip.

Do a final check for matching inseam lengths on front and back, make any adjustments at the hem, and…With that, the draft is complete! We trace off the blue outlined piece for the Back of the trousers, and the black-outlined piece for the Front of the trousers.
(originally there was a link to another Foundations Revealed tailoring article here, my apologies that it's no longer available.) Mockup/Toile
I tried to do inlays and seam allowance like Jason M.’s illustration , and it worked ok but I think I’ve been a dressmaker for long enough that it was unnecessarily complicating things for me. I didn’t like the way it made me make all the adjustments on the back piece only. If, like me, you are mainly a dressmaker, go ahead and add whatever seam allowances you are accustomed to for this. I used ½” seam allowance on all edges except for the hem, where I used a 1.5” allowance. The other exception is the center back seam, where I followed a modern convention of making the seam allowance very wide at the waist (1 ½”) , tapering out to the regular ½” by the time the seam curves into the fork. This allows the waistband to be altered very easily. Sew up your inseams and outseams, sew up the back and the fork (leaving yourself some length at the center front for a fly), and press and/or sew up the top edge and the hems. The hem is curvy, so watch out—you may need to clip it in the toile stage to get it to lie flat, even though with the wool or linen you’ll be able to steam and stretch it to shape.Don’t press a crease into the leg! It’s not a thing yet. Ready? Here we go! Test-run trousers photo time!


Here’s the first toile! We’ve got some work to do but it’ll get there. I notice that the shirt has added a not inconsequential amount of bulk, but even without the shirt it’s a bit too tight in the waist. So I’ll need to let it out a bit there. I also notice that it’s way too short in the leg (This was my fault, I measured to the ankle instead of almost to the heel). Again, the hip area does pretty well without the shirt, but with the shirt the rise is too high and tight, so I’m going to lengthen the whole hip area a bit.
Since trousers are a less familiar garment to me in the fitting area, I took a moment to look through the fit corrections in a book “Classic Tailoring Techniques” by Roberto Cabrera and Patricia Flaherty Meyers. (This book is often recommended as a beginner textbook for basic men’s tailoring, very helpful.)
I see that I need to do a “flat seat” correction, and also a “bow-legged” correction in order to get everything smooth. When I’m pattern correcting anything more than one or two changes, I like to draw a little diagram with all the proposed changes and check them off as I do them. I also make any notes as I go, such as if I decided to change the amount of correction while I was in there.

The dotted lines are the new, corrected pattern.
A bit more about the two more advanced corrections, flat seat and bow-legged:
In modern pants, I don’t usually have to do these types of corrections, so it definitely made me pause a bit. I think that these were both helping to balance that super straight side seam, as I mentioned in the drafting section. My original draft was not quite so nicely balanced as the one I drew for you here, and mostly the corrections I’m making are giving more shape to that side seam and taking it away from the inseam. (Amazing what you learn by going through a draft the second time!) The amounts for both of these corrections were given in the book, and they worked perfectly for me. Since there were a few large changes that I couldn’t do on this toile, I made a second one.


And, let me also give you the ones without the shirt tucked in.


I was really pretty happy with this version! You can see when the shirt isn’t tucked in that it’s fitting quite nicely, even a little loose. It’s the comfiest waistband I’ve ever worn, nice even pressure across the tummy. It doesn’t have the same horseshoe wrinkles on the back of the leg as the first toile, and the seat is now pretty nice and smooth. I learned when I made my husband some trousers a few years ago that you do NOT want to take all of that ease out of the back of the leg! Some is needed to sit down. A little bit extra is ok, especially in this case where it will be covered by a frock coat. I decided not to let the hip out in the side seams any more, trusting that the heavier fabric wouldn’t be wrinkling the same way at the hip once it had a nice solid waist canvas in there.The longer leg is definitely better, but it still needs a tiny bit more length to get all the way to the top of my foot, AND still be able to sit down in it. I did pin a scrap of muslin at this point at the hems and going under the shoe, just to check. I was trying to get away with NOT doing the stirrup under the shoe if at all possible, but sadly it is absolutely essential to keep the leg smooth and (in my case) to keep the back of the trouser leg from riding up and getting caught on the top of the boot.
Here’s my little diagram for 2nd round of corrections. All I did was lengthen the lower leg a bit more, but I also needed to add a fly piece and pocket placement at this stage of patternmaking, so I went ahead and added that to my sketch so that I wouldn’t forget to do them.

With that, we are moving on to the final pattern! I’ll show you here all the extra little pieces that I’ve made and traced off of my main pattern.
In historical fashion illustrations, I’m seeing either a little shaped waistband or no waistband at all. I want to try my hand at what one of my tailoring books calls “French tops”, no waistband. It's essentially a wide, reinforced facing. So, I’m going to trace off the top 2” of my trouser patterns, and give them seam allowances. In dressmaking I’d call these pieces facings, so that’s what I’ll call them here as well.

I’m making one right-hand side hip pocket (or seat pocket), so I’ll need a few pieces for that:
-Pocket Flap
-Pocket Bag
-Pocket Facing
I start by drawing a straight line 6” across on my Under-Piece pattern (back side of the trousers), where the center of the opening will be. Then I draw my pocket flat shape. (This shape is the same as the front pocket on one of my antique trouser reference photos.) A buttonhole is added in the center for pickpocket security. Trace the shape, add seam allowance on all sides, and you have a Pocket Flap!

Now for the other back pocket pieces. We draw a box the length we want the pocket to be, and make the sides about ¾” wider than the pocket opening on both sides. Then, extend the sides of the box all the way up to the waistband. The pocket bag is going to be one long piece that goes from the top of the waistband, down to the bottom of the pocket, and back up to the pocket flap opening. Don’t forget ¼” seam allowance at the pocket end, and whatever seam allowances you used for the waist!
We draw two more lines above the pocket flap bottom line, each ¼” and ½” away, parallel to the original line. These will make a little box, which will be the opening of the pocket plus seam allowance. We also will make a 2” wide strip that will be put on the pocket bag. This is the pocket facing, put on so that when the pocket opens it will still all look like the same fabric, even if the pocket bag is a totally different fabric.

Lastly, you’ll need a fly piece. I’m doing a button fly, so I draw a parallel line to the center front, about 1.5” away. Curve it in to meet the center front line right about where the center front line starts to curve away in the fork. On the main pattern make a little notch to mark this point. Also make a notch in the back seat seam, about 6 or 7” from the top edge. This will aid us in fitting the back waistband.

Later on I decided to use a “grown-on” fly piece at the front because my fabric is SO thick, but I still need a piece shaped like this anyway to make the button catch. You can use this piece and seam it on if your fabric is thinner. If you want to make it “grown-on” like mine, simply cut off the center-front seam allowances on both pieces and tape them together.
Ok, here are all the little extra pieces! I’ve used ½” seam allowance on all, except for the pocket bag and pocket facing.
Now, onto the fun stuff, where it starts to feel real: Cutting out!
Cutting out the pieces
Real tailors apparently chalk their patterns directly onto the fabric, and add seam allowances/inlays in specific parts and specific ways, as needed. This helps with any alterations in the real fabric, later on. I am a dressmaker, so I’m using mostly ½” seam allowances which are already added to my paper patterns. The only exception is the hem (1.5” there) and some of the little internal canvas pieces which have NO seam allowance. I’ll show you those as I cut them out.
For fabrics, I have:
-Heavy linen twill for the main body
-stiff linen canvas for waistband, fly, and pocket reinforcement
-thin but durable cotton Silesia pocketing (for pockets and fork stay)
-fun cotton lawn for my inner waistband facing (not historically accurate—use pocketing instead)
I cut the big main leg pieces first, then cut little pieces as I went.
Fore-Part and Under-side each get cut twice out of the main fabric. There was no grainline indication in the original 1840 book, so I went with a balanced line down the leg. The other pieces to be cut of the main fabric are the pocket flaps (cut a pair for each flap), pocket facings (one for each pocket), and fly pieces for button-catch (cut 2 for button catch, and 2 more if you aren’t using the grown-on style of fly on the main pieces). Here are the canvas waistband pieces next to the facings. Cut the canvas pieces with allowance on the seams, but none on the waist edge or bottom edge.

You’ll also want to cut a pair of fly pieces in canvas—one for under the buttons, and one for the button-catch (buttonhole piece).If your main fabric is not very sturdy, you may also want to cut a canvas piece to reinforce the pocket flap.
We will also cut a small strip (7” x 1”) of canvas to reinforce the pocket opening.(pockets are where a lot of the work is in tailoring, can you tell?)
Lastly, we’ll need pocket bag(s) cut in the pocketing. I also cut two 6” squares of pocketing for use as a fork-stay. These will be pressed in half along the bias and basted in the fronts at the crotch point to keep it from stretching in the seam.

Yay! On to the sewing!
Sewing
I’m following instructions mainly from a book, “Practical Tailoring” by J.E. liberty, 1933. It has a subheading “The art and craft simply explained for the student and apprentice”, and I’ve found it very helpful. The trouser making directions start on page 19.
I read a few different tailoring manuals to try to get a sense of overall construction. They didn’t differ very much in the construction, only in stylistic details. What I present here is following those directions, with minimal changes, in order to come up with an end result like that of the antique trousers seen in the auction photos. I don’t have any photos of the insides or actual antique trousers in my collection, so please forgive me if you DO and there are differences here.
I’m using 30 wt Gutermann silk sewing thread for the handsewing and any machine sewing.
We shall begin with the pockets—in this case the one back pocket. The pockets are easily the most time consuming part of trousers. The rest of the construction will go pretty fast once the pocket(s) are done!
Start by marking the 3 parallel lines ¼” apart, on the right side of the back piece. These will be the seams of the pocket opening. Use the pattern piece for placement. I mark with pencil or chalk, then thread-mark.


Flip the piece over, and pin that 7”x1” strip of canvas to the wrong side over the pocket opening mark. Secure in place with basting thread and long basting stitches or padstitches.


Now we turn to the pocket bag for a moment. Serge the long edges of the facing piece, and stitch it onto the pocket bag with the top edge ¼” past the line for the top of the pocket opening. (Or turn the edges under and fell-stitch it on if you are going 100% historical sewing here.)

I put mine a bit high in the photo, so do as I say and not as I do!
The last component of the pocket is the flap. For the outer part of the flap we need an outer piece with seam allowance and an inner one which only has seam allowance on the bottom edge that attaches to the pocket opening. I simply heavy starched the second of my two linen pieces, cut off the extra seam allowance, and used it for this purpose, but you could use canvas in the inner piece instead. Place the inner piece on the wrong side of the main pocket flap. Fold the edges over and baste through all layers.


Here it is from the right side.

Next, we will line the pocket flap.
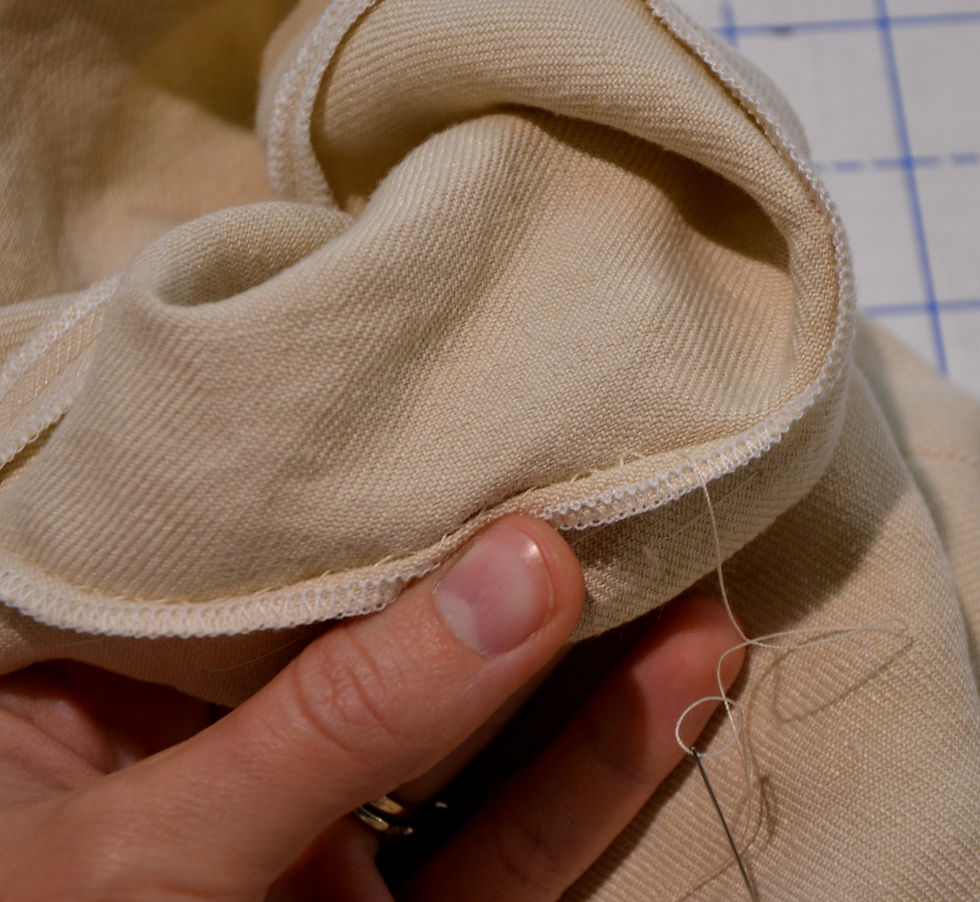
This can be with the same fabric as the outside, or a fun lining fabric. I’ve chosen to use the same star print cotton lawn as for the facings, to make things easier to see. Press the 3 outer edges of the flap lining piece under, a tiny bit more than your seam allowance, so that it will be a little smaller than the main piece. Leave the edge free that will be seamed into the pocket opening. Lay the lining piece on the main piece, pin, and sew through all layers as close to the edge of the lining piece as possible, with a small backstitch (as shown in the auction photos) or a prickstitch. In the last image here, I’ve backstitched the top edge and prickstitched the sides.


I also made a little video of the backstitching for you here.
Ok! For the finishing touch, I’ll add a buttonhole in the center of the flap.
I’d like to share a hack with you. If you haven’t quite got the hang of a handmade buttonhole with gimp thread, try making a skinny machine buttonhole first, cut the buttonhole open, and then doing the handstitching over it! I’ve used heavy silk buttonhole twist from Wawak.com for this.
If you don’t want to do that, you need some other way of firming up the fabric before you can cut it open and sew the buttonhole. The historically appropriate way is to tiny backstitch a box that will be covered by the buttonhole stitch. I’ve also used a machine on a short stitch length to sew two parallel lines about 1/8” apart as a faster version of this.
The second photo here shows the shape of the buttonhole stitch. I’m left-handed so it may be a bit weird. I start at one corner of the straight end, go all the way around the keyhole and back down the other side, and finish with a few large stitches over the end of the buttonhole to even everything up.
Last note: Do yourself a favor and get a buttonhole chisel (or just use a regular one if you have one in the toolbox)! I used to always cut mine open with a razor blade or x-acto knife, but the chisel is inexpensive and absolutely straight, making perfectly clean lines.


Now that we have all the pieces, let’s put this pocket together.
Pin the pocket flap right-sides together, matching the pocket flap seamline with the bottom line of the 3 we marked earlier. Baste in place. Then, pin the pocket bag on that same seamline, as shown. Machine sew the pocket flap and bag on, or backstitch by hand. DO NOT go off the edge of the pocket flap, because that will cause it to pucker once we try to cut it open and turn it. Even a stitch short is fine.


Next, we cut it open along the center line of the 3. At the ends, cut a Y shape so that the short ends of the box have these triangles, about ½” or so long.

The points of the Y near the pocket flap should not extend past the flap, but go right to the corner, leaving perhaps 1 or 2mm space. Err on the cautious side, because it’s very easy to cut it open a little more but once it’s too big you can’t go back.
Ok , this next part is a bit tricky. We’re going to secure the other end of the pocket bag now. It needs to be seamed on in such a way that it’s going to finish the other side of the pocket opening, AND extend up to the waistband to help take the weight and keep the pocket from distorting with time.line the top edge of the pocket bag up with the waist, as shown. Use pins to place a line on the BACK of the pocketbag, even with the top of the pocket opening seamline. (you could perhaps measure down from the waist to place this line, alternatively.)


Now the fun part. We’re going to curl the pocket bag around in a circle, with the facing against the right side of the back leg of the trouser, and the waist edge of the pocket bag pointing towards the knee. Use pins to line up your newly marked seam line with the top of the 3 parallel lines on the back trouser leg, then machine sew or backstitch this seam. Aim for a little shorter of a seam here, to ensure that the pocket flap will cover the opening completely. I made another small video to show you this.

Pretty nifty, right?
Go ahead and turn it as I did in the video. Now that it’s all settled, we have only to secure the triangles at the ends of the pocket opening and finish the edges of the pocket bag. See how I’ve turned the triangles to the wrong side? Flip the sides of the trouser out of the way, and stitch them to the pocket bag with a very small and dense straight stitch, as close to the opening as you can.


At this point, I will add some topstitching to the seamed edge of the pocket flap, to secure this edge and make sure the pocket bag doesn’t ride up. I did this by hand to match the rest of my topstitching, but you may be able to get a machine in there.


Now we will finish the pocket bag. Stitch it together below the pocket opening, and serge or bind the raw edge all the way up to the waist.

There are a few small bits to finish up this pocket.
Tiny backstitch or machine stitch with a short stitch length the sides of the pocket flap, through all layers.

Lay the whole piece flat on a table, and pin the top of the pocket bag to the waist where it is laying. You may need to trim a bit. Then, machine stitch or baste in the seam allowance.

Now, sew the button. Mark the place for it with a pin through the keyhole (top) part of the buttonhole. I sewed my button on with the same silk thread as used for construction, and tried to really pack the button full of thread before removing the pin and wrapping it a few times to make a shank.


YAY! The pocket is all finished! You now have pocket powers.
Waistband and Fly Pieces
Remember those fork reinforcement pieces? Pick one of those up and pin it to the wrong side of the Fore-part (front trouser leg) right over the crotch. Stretch the bias a little but not a lot. Place it so that the whole corner edge is covered. Baste in place along the seamline, and trim any excess in the seam area.


I decided to serge all the edges of my big pieces for easier alterability later on. You can do this, hand overcast the edges, fell them down once sewn, or leave them raw.
Next, we turn to the waistband.
Sew the canvas waistband pieces together at the side seam. I didn’t want the side seam to be too bulky, so I overlapped the pieces and sewed rather than the usual turn. I notice that trouser alterations tend to be done at the center back seam rather than the side seams, so the fact that this is less alterable doesn’t bother me.


There’s a lot going on in this next photo. I’m putting the waistband canvas pieces in, in much the same way as the pocket flap. I basted the canvas pieces into place right up against the seam allowance for the tops. The waist seam allowance was then folded over and basted down through all layers. Lastly, the top seam allowance is fell-stitched onto the canvas (not all the way through to the outside please) in a variation of fell-stitch the Practical Tailoring book calls “serging”, where you point the needle and stitch back towards yourself as you go instead of pointing it away/in the direction of the seam. This allows for a very closely spaced stitch.
Also please note that I’ve folded the wearer’s left front fly piece over at the center front line, and the right side one is still extended. If you are seaming these pieces on, you may do so at this point.
Give the right-side fly piece the same treatment as the waistband. This will be where we stitch the buttons. I’ve used a piece of the main fabric heavy-starched as I didn’t have any canvas pieces big enough.


Next we will make the button-catch, or the fly piece with buttonholes.
Seam two fly pieces together at the center front edge, or cut on the fold. Turn the tops in by the seam allowance amount and slip-stitch, or machine stitch wrong sides together and turn. Serge the curved edges together or hand-overcast.
If you are working with extra heavy fabric, you may wish to cut away the top layer of this button catch where the top buttonhole will go, to reduce bulk. I did not do this step, and wish I had, as it’s quite hard to button through all the layers.

Mark 6 buttonholes on this fly piece, evenly spaced. The top buttonhole is to be marked ¾” from the top, and the bottom one about 2” from the bottom edge of the button-catch. The top one will be done through the outer layer as well, so don’t do it yet. Only make the lower 5 buttonholes. I did these by machine first and then with buttonhole twist by hand over those.

Place the button-catch on the inside of the left main piece. Baste it in, stretching the top layer (the main trouser center front) a bit as you go. Then hand backstitch or machine stitch through all layers, ¼” behind the ends of the buttonholes.
I continued this stitching onto the waistband for a few inches, trying to copy the antique trousers. You could continue this all the way around the waistband if you wanted to really firm it up, or simply backstitch for 2” under the spot where each suspender button would go. (Two at the back, each 1 ½” away from the center back, and at each front side a set 3” apart, with the outer ones 1 ½” forward from the side seam.)


Now it’s time to make the top buttonhole. I’ll show you the alternate method here, machine stitching a box and then handstitching the buttonhole.


Let’s line the side which holds the buttons. Press the edges of the lining piece under, and backstitch or machine stitch through all layers along the opening and top edges. Fell stitch invisibly the interior edge.

At last, the two will finally become a pair of trousers! Sew the two legs together from the bottom of the button-catch to the back seat notch. It makes any sewing at the front (buttons, zippers, etc.) a little easier to leave the back open this way, but you may sew the back all the way up now if you wish.


Mark and sew the buttons onto the right side of the Fore-part, same procedure as for the back pocket.

For extra reinforcement, backstitch All layers together (button bearer, button catch, and left fore-part) along the bottom, curved part of the fly topstitching that you did earlier.

At this point, go ahead and try the trousers on to check the fit of the waistband before we close it all up with the facings. We will also pin up the hems and check those at this point.


Ok! I’m super pleased with how the waist and hip are fitting, so good news there. The ankle hem is too small, which is making the whole leg ride up in a most unattractive manner. I’ll let out the bottom hems at the outseams and inseams as much as possible.
I did play with trying to slim the leg a bit, but kept running into the problem that my boots’ ankle opening was almost as big as my calf. So if you want nice slim trousers, make sure your shoes have slim ankles as well. :C It is ok to have this kind of voluminous look in daywear for the romantic era.
Let’s finish these up! We are so close to completed trousers now!
Go ahead and sew up the back seat seam if you needed to make any changes.
Time for the waistband facings! I elected not to do a waistband curtain, as the shirt fills up quite a bit of the space anyway, not to mention my hips. Sew the side seams for the facing pieces, and press the top and bottom edges under. Lay each piece over the canvas, a little short of the top edge. Prickstitch or backstitch the top through all layers, and fell-stitch the bottom edge of the facing. At the back seat seam, lay one facing’s edge flat and turn under the center back edge of the other facing piece. Fell stitch to secure. Fell stitch the edges at center front as well.


Now for the hems! Baste the hems up with a large padstitch, leaving about a ½” space at the top of the turnback to work with. If you are doing a wide hem like me, you will need to steam and stretch it to fit the curve over the top of the foot.
Do a tiny invisible stitch to secure the hem, NOT traveling over the top of the turnback but instead a little bit down. This will make it so there’s no ridge seen on the outside. You may alternatively, do a small hem and fell the edge down if you wish to avoid the serger.


Hooray! They’re almost done!
When I first started this project I hoped I’d be able to get away without the strap under the shoe and suspenders/braces. I don’t need braces to hold my pants up, BUT I notice that when I’m tugging up the waistband to see if I can further smooth the fronts, it’s exactly at the points where the buttons for braces would go. SO, I’ll be adding those buttons and wearing braces.
In the same vein, you really do need straps under the shoes to hold the hems completely down and keep them from riding up and catching on the top edge of the boot as you sit or walk. Since I want to be able to wear these in everyday life as well as historical costume contexts, I’m going to make my stirrup straps detachable with buttons and buttonholes, same as one of the antique trousers has.
I was unfamiliar with these so I decided to drape them the first time, rather than try to draft them. After the fact, I can say the measurements I took initially DID match up with the piece I draped, so you could draft a little strap piece with confidence from these. DO make sure you can still sit when your stirrups are attached! It might mean you have to make them a bit looser than in the fashion plates.


You can measure under the arch of the shoe, from one hem to the other. Do it twice, each time about 2” apart, to get the angle right at the ends of the piece. Add the length of the buttonholes to each side of this piece, plus ½” (1/4” for edge beyond the buttonholes, and ¼” to make sure the buttonholes aren’t seen ).
For each stirrup, cut 1 of the main fabric and 1 lining fabric. Here I’m using plain weave white cotton. If your main fabric is thinner, you may be able to use it as the lining. I did these completely by machine. Stitch all around the edge, leaving a gap for turning. Turn, press, and machine stitch close to the edge through all layers. If you want to handsew it all, follow the same method as the pocket flap for construction and edge finishing.
Make the buttonholes. I tried both orientations and found I liked the sideways buttonholes better. I’m using these antique Victorian shell buttons because the cute rounded flat brass buttons on the fly were also an antique set and there weren’t enough to do the hems as well. Sew the buttons onto the cuffs. I chose to sew all the way through to the outside since these buttons take a lot of stress, but you may do them invisibly if you wish.


Final Photos


This was a fun project! I’m very happy with the end result, and can’t wait to make the waistcoat and frock-coat to go with it and complete the look. I think these would look even smoother with a wool fabric, though I am so happy with the linen for breathability in my mostly hot and dry home climate. The waistband is super comfortable and still very secure.
I’d love to answer any questions you have about this process, and hear about your experience with this draft! Tune in for more as I continue to publish the rest of the draft and sew experience!
Bibliography
Practical Tailoring by J.E. Liberty. 1933
The Tailors’ Master-Piece By Scott and Wilson. 1840
How to Make Men’s Clothes by Jane Rhinehart. 1975
The Taylors’ Instructor by James Queen & William Lapsley. 1809
Classic Tailoring Techniques by Roberto Cabrera and Patricia Flaherty-Meyers, 1st ed.1983
Foundations Revealed articles:
Victorian Trousers parts 1 and 2 by Jason MacLochlainn.
Tailored Details for Trousers by Nicole Rudolph
A History of Trouser Drafting by Charlotte Thomasius

Comments